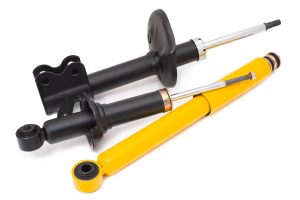
Did you know that having your car’s suspension system replaced can cost you around $1,000 to $5,000?
And that still depends on whether you have a standard or luxury vehicle. Of course, you can expect to pay more when your ride falls under the latter.
But were you also aware that not all suspension issues, such as worn shock absorbers or knocking struts, already warrant an entire system replacement?
That’s right. Your car troubles may only have something to do with your shocks and struts.
The good news is, with a better understanding of these components, you can replace them on your own. This then saves you a lot – from an average of $200 to $1,500 (parts and labor from a repair shop) down to about $150 to $250.
So, follow these tips on DIY replacement of these parts to bring down your suspension repair costs.
1. Know When to Replace Shocks and Struts
The first thing you need to do to save money on repairing or replacing shocks/struts is to know when you should replace them. Like how you should know when to change other things on your vehicle, such as the oil, flat tire, and filters among many others.
After 12,000 miles. That’s a good general rule of thumb you should follow.
There are also a few signs that will tell you it’s time for new shocks, such as:
- Diving when you step heavily on the brakes
- You feel all those bumps
- Your car wanders to the left or right even with the wheelset straight
- Shock fluid leaks
On the other hand, you’d want to get new struts after about 50,000 miles. Since these wear items absorb all the bumps you drive by on the road, it’s too much to expect them to still perform well beyond this distance.
2. Using a Spring Compressor
Before you start removing anything, determine whether you’d need a spring compressor first. You’d need this when you have shocks and struts integrated with the springs.
Don’t take this lightly! Even the slightest mistakes when taking off the springs can result in serious damages when they pop off and hit something around them with so much force.
3. Lift or Jack Your Car Up
Great job if you have a lift; this will make things a lot easier. If not, then a jack can do the trick of raising one side of the car.
Once you’ve raised one side, quickly but securely slip a jack stand just right below the area behind your front wheel.
4. Take The Wheel Off to Remove the Shock/Strut for Replacement
If you determined you need a compressor from step 2, its time to use this device. Also, you most likely have to use a socket and an impact wrench to remove the bolts securing the struts.
5. Put the Replacement Shocks/Struts In
If you’ve followed steps 1 to 4 without problems, then you’d basically just do the reverse from this point on. A torque wrench is useful in tightening the bolts on the newly-installed shocks and struts. Your OEM has specifications when it comes to how tight to secure the bolts, so make sure you follow this.
Once you’ve mounted the new absorber, just put back the wheel you removed from step 1. Do the same steps for the other side of your car.
Test It Nice and Slow
Don’t just go and burn rubber as soon as you’ve replaced your shocks and struts. You should give it a nice and slow test drive first to make sure your money-saving DIY project went well.
Want more valuable DIY car repair tips? Feel free to check out our blog site then! It’s full of auto repair tips every car enthusiast should know.
The post 5 Tips On Replacing Your Shocks And Struts appeared first on YouFixCars.com.
5 Tips On Replacing Your Shocks And Struts posted first on https://jacobslowpriceautoglass.blogspot.com
No comments:
Post a Comment